Showing posts with label cream cheese frosting. Show all posts

Tuesday, February 26, 2013

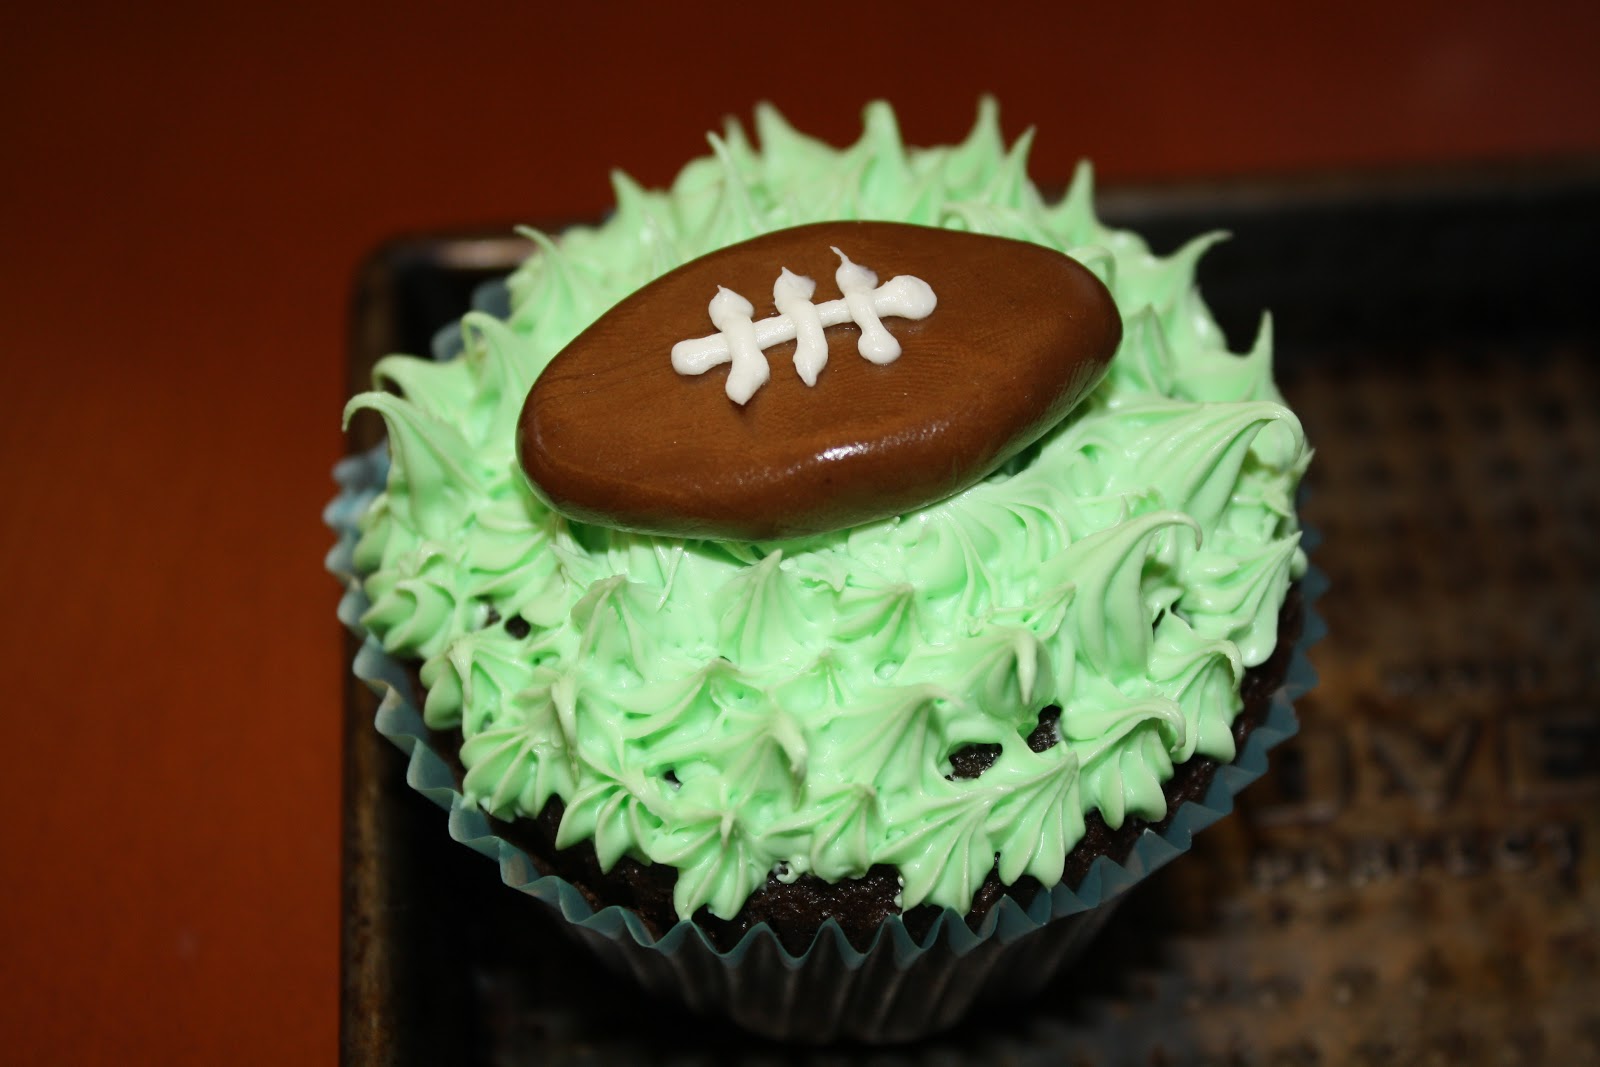
Football Cupcakes!

This post is extremely late but what's new, I have a million things to do in this hectic college life of mine! It was so exciting to see the San Francisco 49er's in the Super-Bowl this year and devastating to see them lose, but they did not go down without a fight. Proud to be a native Bay Area sports fan these days!


I made these a few weeks ago for the Super-Bowl and anyone who was watching in my lounge a few weeks ago.  I'll take any excuse I can to bake, let's be honest. 

Just so you all know before I proceed this is going to be a decorating post, not a recipe post!  I totally cheated because of my time constraints and used boxed chocolate cake mix and bought frosting.  I rarely do this but I had to so sorry about that.


These cupcakes look adorable and are quite simple to execute.  All you need is a few ingredients and a little bit of patience.  They are not only perfect for professional sporting events but also for kids birthdays or just for fun!

I have not been on my baking game lately and I really miss it so I am hoping that maybe this weekend I will be able to carve out a few hours to relax and "whip" out (see what I did there) my oven mitt and electric mixer.  

If any one has any suggestions just let me know, I'm always interested in all of your opinions and could always use some fresh ideas. 

What you will need: 
- Cupcakes and liners
- Frosting (both of these can be found in my recipe index)
- 24 unwrapped Tootsie Rolls
- Small star piping tip and bag


Directions:

Step 1: Start off with 24 ready made chocolate or vanilla cupcakes and your choice of frosting, which must be thick enough to pipe.  Dye 90% of it green for the grass and leave the other 10% white for the lacing on the footballs.

 
Step 2: Microwave the Tootsie Rolls for 15-20 seconds, so that they are still in tact but just soft enough to mold into shape.  Shape each Tootsie Roll so that it is an oval to represent a football.  Using the smallest round piping tip you have, pipe one line in the center vertically and 3 lines across horizontally to displaying the lacing. 


Step 3: Pipe the green frosting onto each cupcake using a star tip to try and represent green grass. 


Step 4: Place one football on the top of each cupcake and you are done! Hand them out, bring to a party, make for a birthday, and enjoy!


As always, I hope you try it out and have a good rest of February- spring is going to be here before we know it! 

Happy baking everyone! 

Wednesday, January 9, 2013

Cupcake Decorating Party and Cream Cheese Frosting Recipe

My sisters birthday is on the 21st of December and so close to Christmas so we usually try to have her birthday party after the holiday craze is over.  


She came up, all on her own, with the idea of having a cupcake decorating party! We got adorable take away boxes, which fit 4 cupcakes perfectly so each of her friends could take their creations home.

I spent the night before making 48 cupcakes, half of which were vanilla and half of which were chocolate. 


I also made chocolate and vanilla cream cheese frosting and filled four separate pastry bags with the frosting so all the girls could be decorating at the same time!


We had a wide array of candies, sprinkles, and chocolate chips to decorate the cupcakes!


Here are just a few of the extra cupcakes that I decided to decorate with the left over heath bar, chocolate chips, and frosting!


Have any of you had the peppermint Oreo's from Trader Joes? They are SO good!  For ten of the vanilla cupcakes I placed an Oreo in the bottom of the cupcake liner before filling it with the batter.  I put chocolate cream cheese frosting on the top of these and they were delish.  Here is a photo of one of them: 


I used store bought cake mixtures for the cupcakes but made the frosting from scratch.  

Cream Cheese Frosting:

1 stick unsalted butter (at room temp, but still cool)
8 oz. cream cheese (chilled)
1 tsp. vanilla
4 cups powdered sugar
1-2 tbsp. heavy whipping cream

Cream butter in an electric mixer slightly for about a minute and then add in the cream cheese and mix together until combined. 
Add in the vanilla and powdered sugar until it gets fluffy (don't worry it will be a bit clumpy for a few minutes but just continue to mix on medium speed). 
Start by adding one tablespoon of heavy whipping cream and beating for 1 minute (add more if it is not the consistency you are looking for). 
Make sure to keep it refrigerated once you're done!

For chocolate cream cheese frosting add 1/4-1/2 cup of good quality cocoa powder before adding the vanilla and powdered sugar and incorporate fully!

This party was really fun and all the girls loved it! Happy Baking!


Wednesday, December 26, 2012

Puppy Dog Cupcakes!

My little sister turned 10!  Becca, along with my entire family, are huge dog fans! We love all dogs of all ages, shapes, and sizes.  So I was inspired by my Hello Cupcake book to make an army of Westie dog cupcakes.  Here is one of the adorable little buggers:


This recipe made 12 big cupcakes and 24 mini cupcakes but you can make more big ones and less little if you like.  It's all up to you!  The cupcakes definitely have some personality and looked so hilarious all lined up on the platter. 


As you can see I used the extra frosting and mini cupcakes to make decorations around the edge of the platter including paw prints and dog bones.

This recipe is going to be for vanilla cupcakes and a cream cheese frosting that you can pipe quite easily.  I also cheated and bought one can of chocolate frosting in order to save time and used it on some of the cupcakes (both alone and tie dyed with the cream cheese frosting).


I am finally home from college for a long month so be expecting lots of posts in the next few weeks! I am so happy to finally have a break from the craziness and be able to spend valuable time with my family and friends. 

I hope everyone had a wonderful Christmas and that Santa Claus was good to you.
Once again, I would like to acknowledge "Hello Cupcake" and Glorious Treats blog for this recipe!

Ingredients:

This recipe makes 12 normal cupcakes and 24 mini cupcakes.

For the vanilla cupcakes: 
2½ cups all purpose flour
2 tsp. baking powder
2 tps. baking soda
½ tsp. salt
½ cup milk
½ cup vegetable oil
1 tsp. vanilla
1 stick of unsalted butter, softened
1 cup sugar
3 eggs

For cream cheese frosting: 
1 stick of butter (at room temp, but still cool)
8 oz. cream cheese (chilled)
1 tsp. vanilla 
4 cups powdered sugar
1-2 tbsp. heavy whipping cream

Other items needed:
A bag of mini marshmallows
Mini chocolate chips
Red jelly beans 
Small pink sprinkles 
Food coloring
Ziploc bags, tape, and scissors for piping bags

Directions:

For the vanilla cupcakes:
Preheat the oven to 350. Line one normal sized cupcake pan and two mini cupcake pans with cupcake liners.
Combine the dry ingredients: flour, baking powder, baking soda, and salt.
Also in a separate bowl combine wet ingredients: milk, oil, and vanilla.
In an electric mixer beat butter and sugar for a few minutes until smooth and creamy. 
Add eggs one at a time on medium speed.
Turn down to low speed and alternate additions of dry and wet mixtures (beginning and ending with the dry ingredients).
Beat well until fully combined. 
Fill each cupcake liner about 2/3 full with batter.
The mini cupcakes will take 8-10 minutes to cook while the normal sized cupcakes will take about 15-18 minutes (or until toothpick inserted comes out clean).
Remove from the oven and allow to cool completely before proceeding.


For the cream cheese frosting:
Cream butter in an electric mixer slightly for about a minute and then add in the cream cheese and mix together until combined. 
Add in the vanilla and powdered sugar until it gets fluffy (don't worry it will be a bit clumpy for a few minutes but just continue to mix on medium speed). 
Start by adding one tablespoon of heavy whipping cream and beating for 1 minute (add more if it is not the consistency you are looking for). 
Make sure to keep it refrigerated once you're done!


I also died about half of it a light orange color by using orange and brown food coloring. 


Assembly of the dogs:
To create the "fur" effect with the frosting you will need to use Ziploc bags and reinforce one of the corners on each bag with a few layers of scotch tape.  Then you will need to cut a small M-shape into that corner.  Fill various bags with your frostings.  In my case I had some plain white, orange, chocolate/brown, and mixtures of the three.  To create a 2-tone frosting place the 2 different colors of your choosing side by side in the piping bag and it will give you this effect.

For the ears you will need to cut 12 mini marshmallows diagonally.  The inside of them will be sticky so you will dip the sticky part into a bowl of small pink sprinkles and set them aside. 


Beginning with the face of the dog, secure the 2 ears on the rim of the cupcake with frosting.  Using another mini marshmallow (that has 1/3 of it removed) for the snout/nose of the dog secure it somewhere around the middle of the mini cupcake. Using the piping bag cover the entire mini cupcake with frosting.  Start on the surface of the cake while applying pressure and pull away quickly while releasing pressure.  For the eyes and nose, use mini chocolate chips, and for the tongue cut a red jelly bean in half and place directly below the snout. 


For the body of the dog, use a large cupcake and create fur like lines using the piping bags. Start in the center of the cupcake and move towards the edges with the frosting.  You may need to experiment a bit in trying to figure out if you want long or short fur and how to make the frosting look how you want. 

Place the mini cupcake on its side on top of the bigger cupcake.


These cupcakes definitely take some patience but they are fun and adorable!


I really hope you all decide to try these out! What is cuter than a little doggie cupcake! Let me know if you have an questions, concerns, or comments, as always. 


Merry Christmas and Happy Baking! 


Wednesday, December 5, 2012

Cookies and Cream Cake

Most people love Oreo's don't they?  "Cookies and cream" brings me back to when I was a little kid because I used to love the ice cream flavor more than anything. 

It was two of my friends at school, Rachelle and Jordan's, birthdays over Thanksgiving break so I figured that when we came back to school I could make them something scrumptious! 


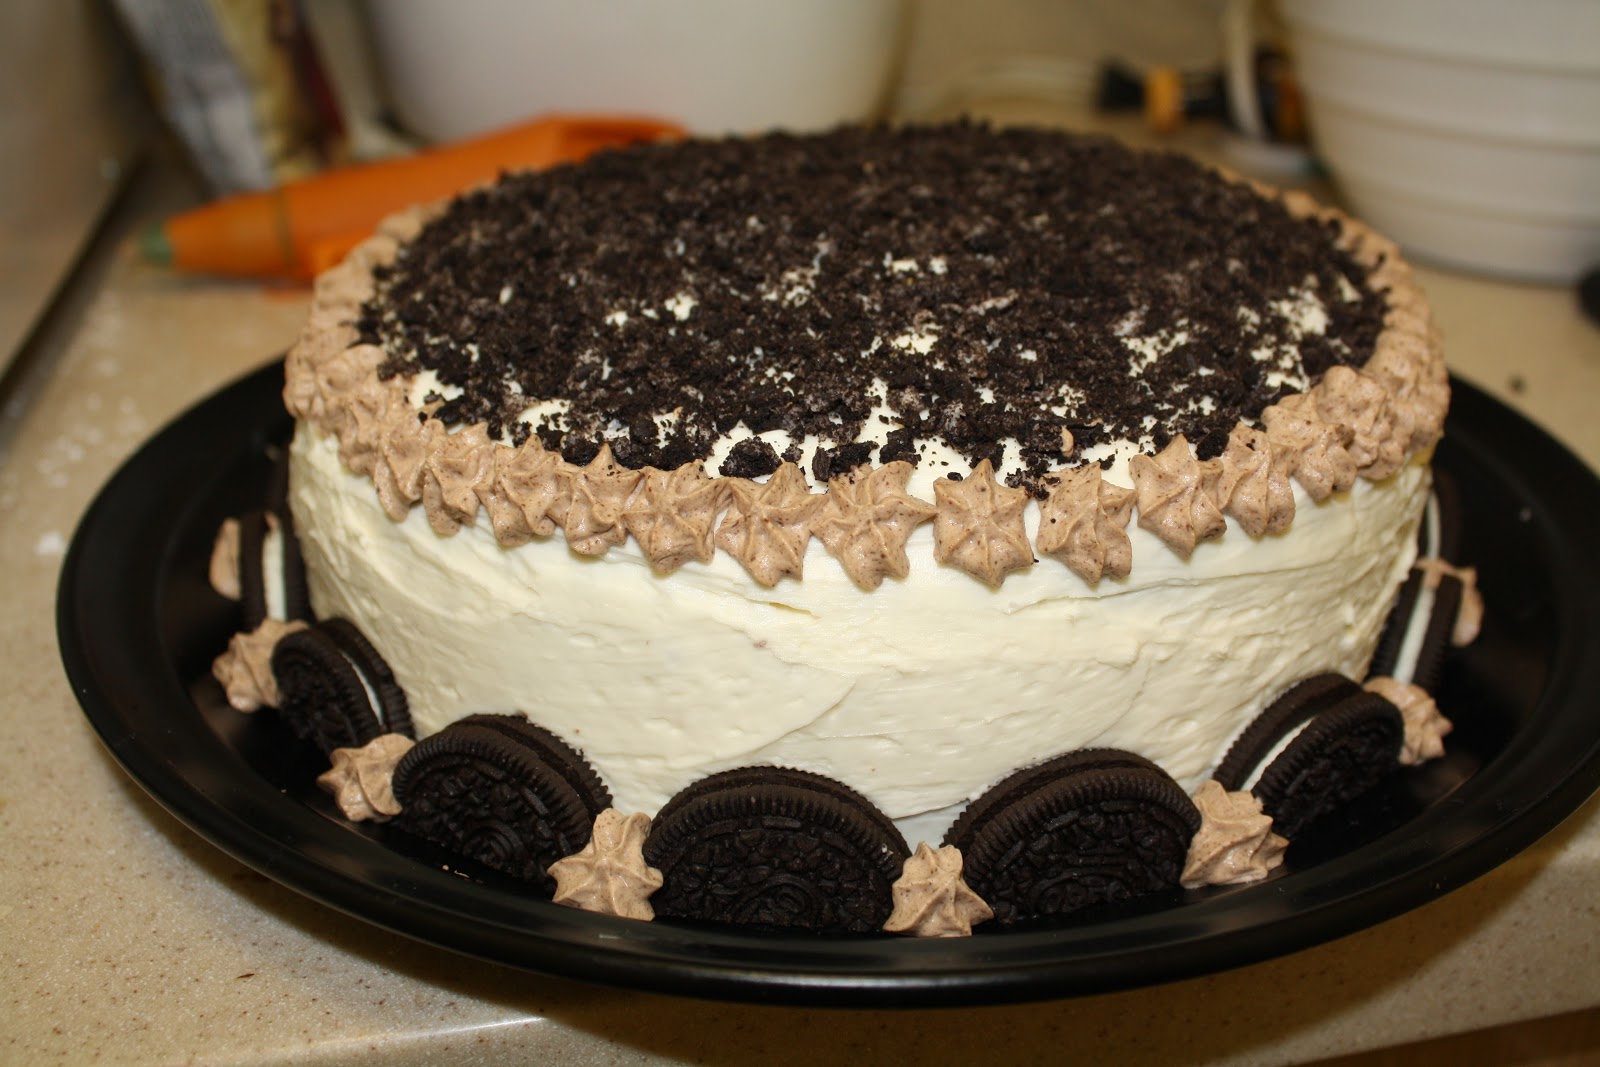
Believe it or not, this is a Cookies and Cream birthday cake and it was quite delicious if I may say so myself. 

The recipe entails the following: dark chocolate cake, Oreo cream cheese frosting filling, a buttercream coating, as well as chocolate whipped cream and Oreo's for decor. 


I have been so busy lately with school work and finals are coming up in about a week and a half so even having time to make this cake was a miracle.  I'm so happy I did though!  It's amazing how just sitting in the common room for an hour with a cake can make it vanish so quickly. 

My amazing boyfriends mom, Sharon, gave me a cute apron a few months ago with a cupcake pattern on it... 


Isn't it adorable? Thanks Sharon!

The decoration of this cake can be done in any way you like but I will explain what I did. After the buttercream frosting had set I chopped up a bunch of Oreos into fine crumbs and coated just the top of the cake with them.  Then with the remaining Oreos I had a cut them eat into half circles and placed them around the base of the cake.  Lastly, I piped the chocolate whipped cream both around the perimeter of the face of the cake and between the Oreos around the base.  I also added a heart on the top with my left over buttercream.  There are many ways that you could go about decorating this so be creative and have fun with it! 


Ok now that your mouth is watering I can give you the recipe... and I would like to acknowledge The Dainty Chef and Cooking Classy for inspiring me to make this wonderful creation.

Ingredients:

This recipe makes a regular sized 2-layer cake.

For the chocolate cake:
1¾ cup all-purpose flour
⅔ cup cocoa powder
1½ tsps. baking soda
½ tsp. baking powder
½ tsp. salt
¾ cup butter (this is one and a half sticks)
1½ cups granulated sugar
1 tsp. vanilla
3 eggs at room temperature
1¼ cups buttermilk


For the Oreo cream cheese filling:
4 ounces soft whipped cream 
1/2 cup soft unsalted butter
2 cups powdered sugar
5-7 chopped Oreos

For the buttercream:
3 sticks salted butter
4 cups powdered sugar
3-4 tbsp. heavy whipping cream
1½ tsp. vanilla 

For the chocolate whipped cream (This recipe makes a lot):
Approximately 1 cup of heavy whipping cream
Chocolate chips

*Note: Also need Oreo's for decoration (1 package is enough for the whole recipe)


Directions:

For the chocolate cake: 

Preheat the oven to 350.  Pre-grease and flour 2 8-inch round cake pans.  Make sure that you put a good amount of flour because I had a hard time getting my cake out. 
In a medium bowl combine dry ingredients: flour, cocoa powder, baking soda, baking powder, and salt. 
In a larger bowl, using an electric mixer, combine butter, sugar, vanilla, and eggs (1 at a time).  
On low speed, mix in the flour mixture, alternating with buttermilk (start and end with flour mixture). 
Divide batter amongst the 2 pans and bake for 30-35 minutes or until toothpick comes out clean.  Let cool completely before attempting to remove from the pans. 


For the Oreo cream cheese filling: 
Beat, with an electric mixer, the cream cheese and butter until smooth.
Gradually add powdered sugar and mix until very well combined.  
Stir in chopped Oreo's (not finely chopped). 
Once cake layers have cooled, spread the filling on top of one of the layers, and place the second layer over. 


For the buttercream frosting: 
Beat butter with an electric mixer until it turns a white color (at least 5 minutes). 
Slowly add in powdered sugar, heavy whipping cream, and vanilla until well combined and retains a thick consistency. 
I decided to use salted butter because it makes the sweetness not as intense and creates a perfect balance. 
Spread over the sides and top of the cake. 


For the chocolate whipped cream (optional):
Take a generous amount of heavy whipping cream and whip with an electric mixer.  
Slowly add in about a half cup of melted chocolate chips (this will be up to you on how much you want to add).  Keep whipping until it is thick enough to pipe. 
This recipe makes a lot of whipped cream so you can use it to put in hot chocolate or anything you want!


Putting it all together: 
As described above, I put crumbled Oreo's on the top, half-Oreo's around the base, and piped the whipped cream all around.  Get inspired by these pictures or come up with ideas of your own! 

Here is a picture of one of the pieces of cake... mmmm I miss it already.


Happy Birthday Jordy and Shelly! Love you guys!


This cake does have a lot of moving parts but they all come together very nicely and it is well worth all the work! 

Happy Christmas season and Happy Baking!


Monday, November 19, 2012

Kappa Sigma Red Velvet Cupcakes with Cream Cheese Frosting

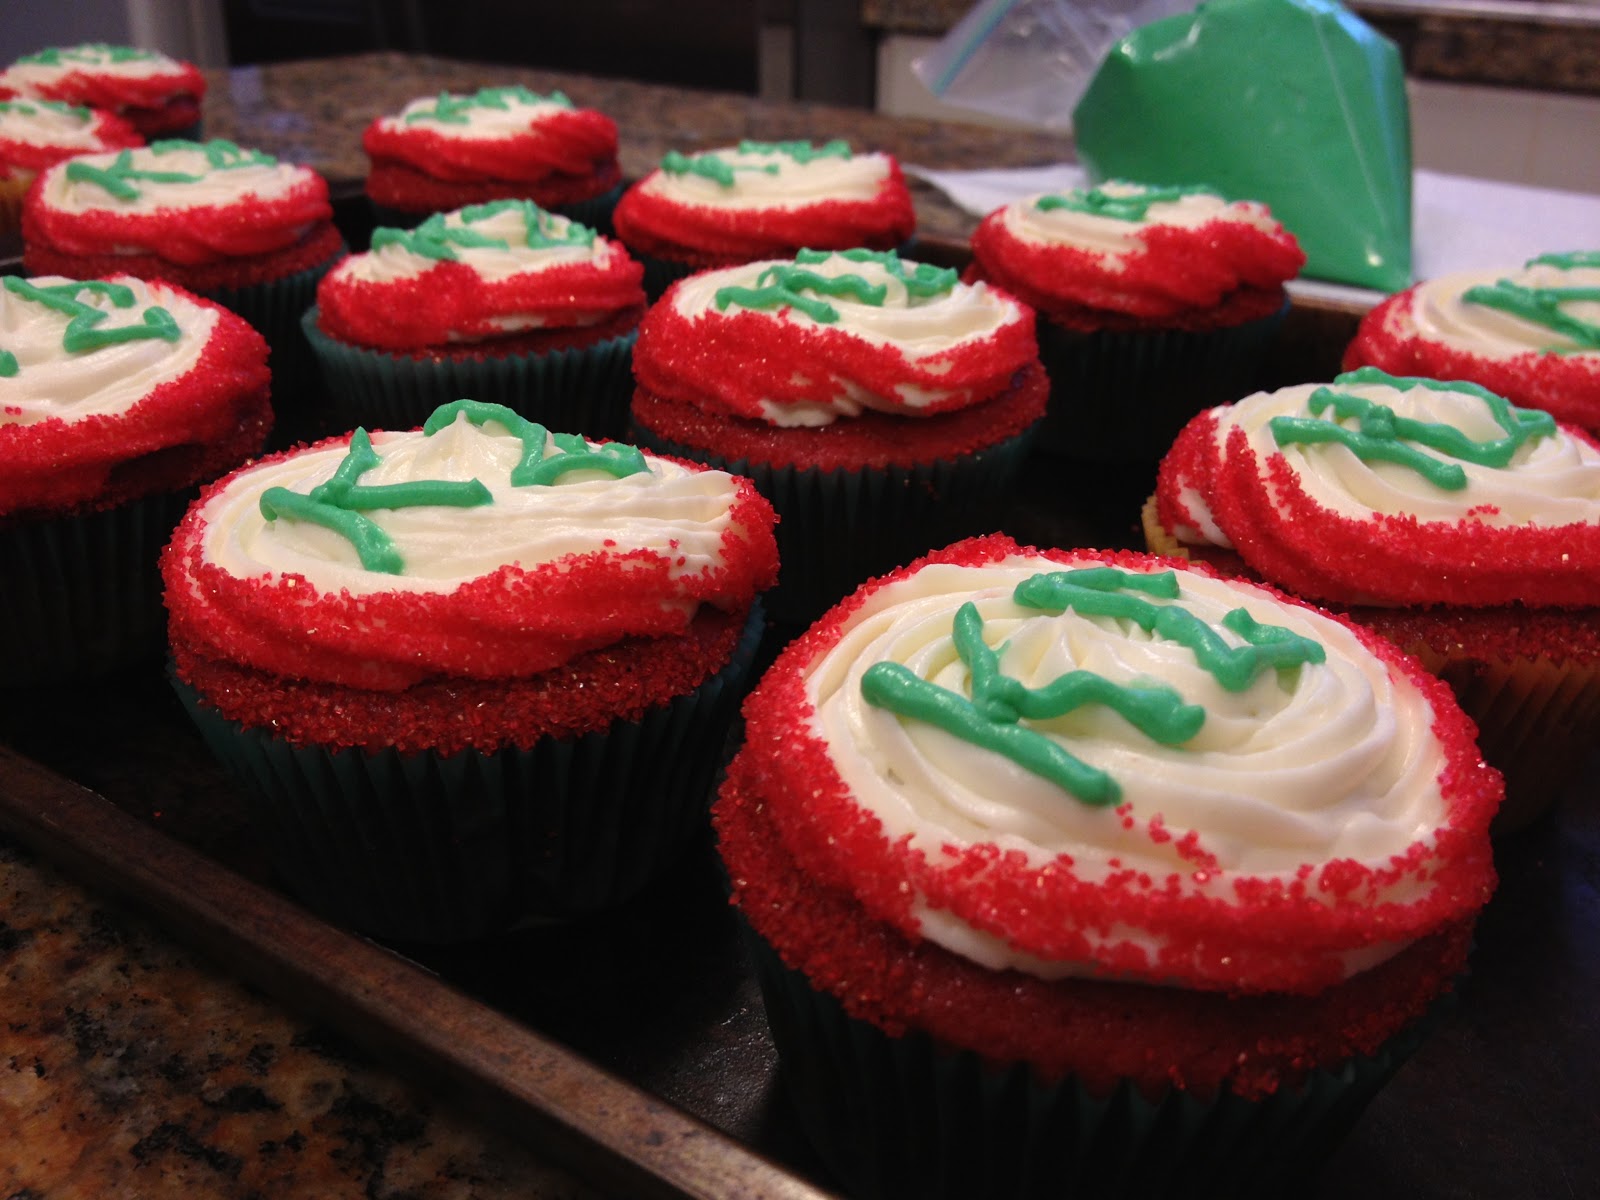
These are red velvet cupcakes, which I have never actually made before, with a decadent cream cheese frosting, red sprinkles around the rim, and Kappa Sigma lettering!


As most of y'all know by now my boyfriend, Jake goes to Willamette University and I go visit him there once a month or so.  He is in the Kappa Sigma fraternity there... and no it is not a "frat." 

I love to bake there because I get to be in the house kitchen and my treats get enjoyed and devoured in a very short amount of time with much appreciation.  


This past weekend when I was visiting was the fraternities initiation for new pledges (which I have somehow managed to be there for 2 years in a row).  So... because of all the events that were going on I had a good amount of time to kill so I figured what better to do than to bake! I spent 3-4 hours in a quiet kitchen with my music and enjoyed the heck out of it.  It had been way too long since the last time I had a date with the mixing bowl.  


I was inspired by Joy of Baking for this recipe. 

Ingredients:

This recipe makes 32-36 regular-sized cupcakes.

For the red velvet cupcakes:
3 3/4 cups all-purpose flour
3/4 tsp. baking powder
3/4 tsp. salt
3 tbsp. cocoa powder
3/4 cup unsalted butter
3 eggs
1 1/2 tsp. vanilla extract
1 1/2 cups buttermilk
2-3 tbsp. red food coloring
1 1/2 tsp. white vinegar
1 1/2 tsp. baking soda

For the cream cheese frosting:
24 oz. cream cheese (this is 3 packages)
1 1/2 tsp. vanilla extract
2 1/4 cups sifted powdered sugar
1 1/3 cups heavy whipping cream

Also used: 
green food coloring
red sprinkles 

Directions:

For the red velvet cupcakes: 
Preheat the oven to 350.
Prepare 3 cupcake tins with cupcakes liners. 
Sift together flour, baking powder, salt, and cocoa powder. 


Beat butter on medium speed in an electric mixer for 1-2 minutes.  
Add sugar and mix well.  Continue by adding eggs one at a time, followed by the addition of the vanilla extract (continue to scrape down the sides after each step).


In a separate bowl measure out the buttermilk.
Begin adding red food coloring drop by drop, while whisking, until you reach a deep red color.


Switch off adding the red buttermilk and the dry ingredients to the butter mixture (beginning and ending with the dry ingredients). 


In a small separate bowl or cup combine white wine vinegar and baking soda.  Let it fizz and once it has settled down fold it into the batter.


Divide the batter amongst the cupcake liners, filling about 2/3 full, and baking for 18-23 minutes (or until toothpick comes out clean. 


For the cream cheese frosting:
Beat room temperature cream cheese in an electric mixer until creamy.
Add vanilla and then in increments add sifted powdered sugar.  
Slowly add in the heavy whipping cream and mix on high until the frosting is thick enough to pipe.  


Decoration:
First, begin by piping the cream cheese frosting using a wide star-shaped tip onto the cupcakes.  (Optional: Save some to make the leftover frosting green to use for writing)


Pour a bottle of red sprinkles into a large bowl to coat the bottom. 


Dip the edges of the cupcake into the sprinkles and do your best to make sure they are coated evenly.

 
Using the leftover frosting, dye it green, and create lettering of your choice! I used the Kappa Sigma letters but if you want you can draw a christmas tree or write something creative! 


Now all you have to do is eat it and enjoy!


Not to mention the house is beautifully decorated for Christmas! Hope to be back there soon! Props to Jason!


Enjoy your Thanksgiving everyone! Hope you all get fat and happy! 
And as always... happy baking!