Welcome one, welcome all! I have some exciting news that I have created an updated and more "my style" blog on Wix.
The link is http://kelseyseversosweet.wix.com/kelsey-ever-so-sweet and I hope you come check it out!
Happy Baking!
Sunday, April 10, 2016

Wednesday, April 6, 2016
White Chocolate Snickerdoodle Mug Cake
Hello loves! It's me Kelsey, I'm still alive! I truly, madly, deeply want to get back into the whole blogging thing because it's such a great creative outlet for me and allows me to cook and bake as much as I want.... Jake you don't mind right?
I was having my time of the month cravings last night and really just wanted something yummy and I wanted it fast. I found a recipe from Five Heart Home for a Snickerdoodle mug cake that inspired me to create my own, so thanks for that!

Unfortunately my photos may not do this justice since they were taken on my iPhone but you just have to trust me on this one- I would eat it every night if I was allowed to. Even though it's made in the microwave I was shocked at how moist and cakey it came out! One important note is to make sure to use a big enough mug with straight edges for best cooking, though mine honestly did not rise very much.

I hope that I can continue making deliciousness but I am starting adult real person work life soon so we shall see. At least now I will have coworkers to bring yummy gifts to! I just moved to Denver about a month ago and Jake and I are loving it. The restaurants are delicious and all over the place, there's friendly people everywhere, and the mountains and outdoor activities are awesome! I don't think we will be leaving anytime soon.

Thanks to everyone who is reading- you're all wonderful! Alright to the recipe!
Ingredients:
- 1/4 cup all purpose flour
- 2 tbsp. sugar
- 1/4 tsp. baking powder
- 1/4 tsp. cinnamon (at least)
- 1/4 cup almond milk (you can use any kind)
- 2 tbsp. salted butter (melted in microwave first)
- 1/2 tsp. vanilla
- 1/8-1/4 cup white chocolate chips
For garnish:
- 1/2 tbsp. sugar
- 1/8 tsp. cinnamon
Directions:
1. Combine flour, sugar, baking powder, cinnamon in a medium bowl.
2. Combine almond milk, butter, and vanilla in a separate medium bowl. Combine dry ingredients into wet until you reach a smooth consistency.
3. Fold in white chocolate chips.
4. Pour 1/3 of batter into mug, sprinkle some cinnamon sugar and repeat layering process making sure to finish the top off with some cinnamon sugar.
5. Place in the microwave for 1 min 30 seconds-2 minutes.*
*For me it finished around 1 minute and 45 seconds but it depends on the strength of your appliance!
Happy Baking!
Saturday, October 10, 2015
Pumpkin "Ice Cream" (Dairy Free)
Hey y'all! As promised I'm back as soon as I could be! This recipe is one I came across a few months ago and wanted to wait until pumpkin season to carry out.
In the last year or two I've become a lot more sensitive to dairy hence the presence of dairy free recipes. I sure do miss full fat creamy ice cream and sometimes it's worth it for the stomach ache but not always.


Directions:
1. Chop up 4 bananas into slices and freeze in tupperware overnight.
2. The next day combine bananas, pumpkin, maple syrup (to taste), and pumpkin spice in a food processor until uniform. This will create a frozen yogurt consistency that is delicious!

3. If you would like a more icy consistency (as in the first photo on the post) place in a tupperware container and place in the freezer and enjoy at a later time!

In the last year or two I've become a lot more sensitive to dairy hence the presence of dairy free recipes. I sure do miss full fat creamy ice cream and sometimes it's worth it for the stomach ache but not always.

This recipe is pretty simple and all your really need are the ingredients and a food processor, which makes things easy. As you will see the recipe is done after you combine all the ingredients in a food processor and it is up to you if you want to eat it as soft serve right away or freeze it and bring it back out at a later date.
I also have to give credit to The Gracious Pantry blog for inspiring me for this recipe! I only made half of what the recipe called for but I will provide the full amounts so your batch will be twice as big as the pictures I provide!
I hope that everyone is having a wonderful October fall thus far and is looking forward to the holiday season. My pumpkin frenzy has been off the charts lately. Here is the photo of the lunch I made the other day of pumpkin french toast. The bread soak was made up of just an egg, about 1/4 cup of pumpkin, a splash or vanilla, a splash of almond milk, and a few sprinkles of pumpkin spice! It was way too good.

Enough about my obsessions... here's the recipe!
Ingredients:
4 bananas
1 cup pumpkin puree
1/3 maple syrup
1.5 tsp pumpkin spice

Photo: my favorite maple syrup!
1. Chop up 4 bananas into slices and freeze in tupperware overnight.
2. The next day combine bananas, pumpkin, maple syrup (to taste), and pumpkin spice in a food processor until uniform. This will create a frozen yogurt consistency that is delicious!

3. If you would like a more icy consistency (as in the first photo on the post) place in a tupperware container and place in the freezer and enjoy at a later time!

Photo: pre-freezer ice cream.
Hope you try it out and happy baking!
Wednesday, October 7, 2015
Pumpkin Chocolate Chip Cookies (Dairy Free)
So another year has gone by and I have not posted anything on my blog. It's probably the wrong time to attempt to start things up again but here it goes! Amongst mid terms and my last semester of college I may be jumping the gun but don't blame me for trying. I'm entering the time of my life where I must start attempting to figure out what the heck I'm doing with my life and wow is it overwhelming. I've got my head on straight and am taking things one day at a time with no rush to have a concrete plan.
And one of my favorite times of year is upon us. The leaving are changing colors and making there way to the pavement. The rain should be coming soon and it's no longer ghastly hot outside. With fall comes pumpkin everything which I never complain about. Trader Joes is my favorite place to shop this time of year because they have everything from pumpkin ravioli, to pumpkin cream cheese, to candied pumpkin seeds. I just can't get enough of it! And as I read my last blog post it is not so different from this one... raving about fall, what can I say!

So of course with the pumpkin frenzy I had to make something of my own. Pumpkin cookies with chocolate chips, couldn't leave that second part out could I?? I didn't take pictures during the process of making these cookies but they are so easy that I'm sure you won't have any problems!
First off I want to acknowledge a new blog I've found called Two Twenty One where I found this amazing recipe that I will be using year round now that I've discovered it.
There's really not many tips I can give for this recipe because it was just so straight forward and easy. One thing that I did tweak was that the recipe only calls for cinnamon and I used pumpkin pie spice instead which gave it that extra oomph but totally up to you.
Ingredients:
This recipe makes 18-24 cookies.
1/2 cup vegetable oil
1 cup pumpkin puree
1 cup sugar
1 egg
1 tsp. vanilla
1 tsp. baking soda
1 tsp. milk (I used almond)
2 tsp. pumpkin pie spice (or cinnamon)
2 tsp. baking powder
1/2 tsp. salt
2 cups flour
1.5-2 cups chocolate chips

Directions:
1. Preheat the oven to 350 degrees.
2. In a medium bowl, combine oil, pumpkin, sugar, egg, and vanilla and whisk until combined.
3. In small bowl combine baking soda and milk and stir into pumpkin mixture.
4. In another medium bowl, combine spices, flour, baking powder, and salt.
5. Combine pumpkin mixture and dry ingredients until uniform.
6. Fold in chocolate chips to desired amount.
7. Place dollops of cookie dough onto pre-greased cookie sheet (no need to space out a lot, I didn't find they expanded outwards much).
8. Bake for 12-13 minutes, allow to cool, and enjoy!
Happy baking y'all!!
And one of my favorite times of year is upon us. The leaving are changing colors and making there way to the pavement. The rain should be coming soon and it's no longer ghastly hot outside. With fall comes pumpkin everything which I never complain about. Trader Joes is my favorite place to shop this time of year because they have everything from pumpkin ravioli, to pumpkin cream cheese, to candied pumpkin seeds. I just can't get enough of it! And as I read my last blog post it is not so different from this one... raving about fall, what can I say!

So of course with the pumpkin frenzy I had to make something of my own. Pumpkin cookies with chocolate chips, couldn't leave that second part out could I?? I didn't take pictures during the process of making these cookies but they are so easy that I'm sure you won't have any problems!
First off I want to acknowledge a new blog I've found called Two Twenty One where I found this amazing recipe that I will be using year round now that I've discovered it.
There's really not many tips I can give for this recipe because it was just so straight forward and easy. One thing that I did tweak was that the recipe only calls for cinnamon and I used pumpkin pie spice instead which gave it that extra oomph but totally up to you.
Ingredients:
This recipe makes 18-24 cookies.
1/2 cup vegetable oil
1 cup pumpkin puree
1 cup sugar
1 egg
1 tsp. vanilla
1 tsp. baking soda
1 tsp. milk (I used almond)
2 tsp. pumpkin pie spice (or cinnamon)
2 tsp. baking powder
1/2 tsp. salt
2 cups flour
1.5-2 cups chocolate chips

Directions:
1. Preheat the oven to 350 degrees.
2. In a medium bowl, combine oil, pumpkin, sugar, egg, and vanilla and whisk until combined.
3. In small bowl combine baking soda and milk and stir into pumpkin mixture.
4. In another medium bowl, combine spices, flour, baking powder, and salt.
5. Combine pumpkin mixture and dry ingredients until uniform.
6. Fold in chocolate chips to desired amount.
7. Place dollops of cookie dough onto pre-greased cookie sheet (no need to space out a lot, I didn't find they expanded outwards much).
8. Bake for 12-13 minutes, allow to cool, and enjoy!
Happy baking y'all!!
Thursday, October 2, 2014
Homemade Granola
Hello all! Super long time no see. I am really hoping to get back into baking and blogging starting now because I miss it oh so much.
I can't believe it has been almost a year since my last post- so embarrassing! Over the past year I have moved schools, joined a sorority, and trained several puppies to become service dogs. After this semester I will only have two more until the real world swallows me up which is terrifying yet exciting.
The recipe I am walking you through today is pretty simple- homemade granola. I honestly forget where I got inspired by the recipe from so sorry about that. It's basically just oats, dried fruits, and nuts and of course you can eliminate anything if it's not to your liking.

So the fall is upon us and we all know what that means: apple pie, pumpkin spice, hot tea, and changing leaves. The other day in class we had to go around the room and say what our favorite thing was about fall and my response was "pumpkin everything." I swear I could eat pumpkin muffins every day and not get sick of it. So most likely a recipe involving pumpkin is coming your way!
I did overcook mine slightly which wasn't a huge deal but I would just advise that you monitor it fairly closely while its in the oven and make sure you take it out before it becomes super dark brown in color.
I won't bore you anymore with my life story so here you go!
Ingredients:
This recipe makes 5-6 servings.
2 cups old fashioned oats
1.5 cups of chopped nuts (almonds, walnuts, etc)
1/4-1/2 cup chopped dried fruit
1/3 cup oil (I used olive oil)
1 tsp salt
1/4 tsp cinnamon
pinch of nutmeg
pinch of ginger
1/3 cup honey
1/2 tsp vanilla

Directions:
1. Preheat the oven to 350. Prepare a large cookie sheet by covering it with parchment paper.
2. Chop up any desired nuts and/or dried fruit. For my fruit I used mango, cranberry, and golden raisins.

3. In a large bowl combine oats and nuts. Add in oil and honey and stir thoroughly to combine. Add in cinnamon, nutmeg, ginger, salt, and vanilla.
4. Spread out mixture onto the parchment paper.
5. Bake for 25-30 minutes and stir occasionally adding in the dried fruit for the last 10 or so minutes of it baking in the oven.


I can't believe it has been almost a year since my last post- so embarrassing! Over the past year I have moved schools, joined a sorority, and trained several puppies to become service dogs. After this semester I will only have two more until the real world swallows me up which is terrifying yet exciting.
The recipe I am walking you through today is pretty simple- homemade granola. I honestly forget where I got inspired by the recipe from so sorry about that. It's basically just oats, dried fruits, and nuts and of course you can eliminate anything if it's not to your liking.
So the fall is upon us and we all know what that means: apple pie, pumpkin spice, hot tea, and changing leaves. The other day in class we had to go around the room and say what our favorite thing was about fall and my response was "pumpkin everything." I swear I could eat pumpkin muffins every day and not get sick of it. So most likely a recipe involving pumpkin is coming your way!
I did overcook mine slightly which wasn't a huge deal but I would just advise that you monitor it fairly closely while its in the oven and make sure you take it out before it becomes super dark brown in color.
I won't bore you anymore with my life story so here you go!
Ingredients:
This recipe makes 5-6 servings.
2 cups old fashioned oats
1.5 cups of chopped nuts (almonds, walnuts, etc)
1/4-1/2 cup chopped dried fruit
1/3 cup oil (I used olive oil)
1 tsp salt
1/4 tsp cinnamon
pinch of nutmeg
pinch of ginger
1/3 cup honey
1/2 tsp vanilla
Directions:
1. Preheat the oven to 350. Prepare a large cookie sheet by covering it with parchment paper.
2. Chop up any desired nuts and/or dried fruit. For my fruit I used mango, cranberry, and golden raisins.
3. In a large bowl combine oats and nuts. Add in oil and honey and stir thoroughly to combine. Add in cinnamon, nutmeg, ginger, salt, and vanilla.
4. Spread out mixture onto the parchment paper.
5. Bake for 25-30 minutes and stir occasionally adding in the dried fruit for the last 10 or so minutes of it baking in the oven.
6. Allow to cool and enjoy straight up or with yogurt!
Happy baking! I'm happy to be back :)
Sunday, November 3, 2013
Peach Nectarine Cobbler
It's been quite awhile, hello all! I have been through a lot of major transitions lately with moving to a new city and whatnot so my apologies for being absent. I have a few old recipes to post in the near future.
This is a peach cobbler with a butter cookie dough frosting. It is super duper easy, doesn't take long at all, is very sweet, and is great paired with some vanilla ice cream.


Enjoy this immensely! And make sure you use good, ripe fruit.

This is a peach cobbler with a butter cookie dough frosting. It is super duper easy, doesn't take long at all, is very sweet, and is great paired with some vanilla ice cream.

I made this in the summer when the weather was still incredibly nice and the fruit was amazing. I used both orange nectarines and white peaches I believe. I'm not going to lie, I made this ages ago so I don't remember the exact measurement of the fruit part (I do have exact numbers for the topping which is the most important).
I'll leave it up to you but I would recommend using 2-3 nectarines and 2-3 peaches and cutting them up. You probably want to coat them with about 3/4 cup of sugar and some lemon juice. You can play with the amounts (if you like it sweet add more, less sweet don't put as much). I apologize for not making it straight forward but its pretty easy and variable.
Below I will put the recipe for the topping!
I love each season for different reasons but the fall in Oregon is beautiful. We have been blessed with great weather (which is just now seeming to leave us) and the leaves are falling from the trees in an array of great color. In California I never really noticed the beauty of the Fall and the foliage here is in a much greater density so I am able to appreciate it.
Also, the fall means fall foods like pumpkin! Anything pumpkin flavored is going to be something I like, so this time of year is amazing yet dangerous for me.
Ingredients:
This recipe makes 8-inch square pan of cobbler.
Topping:
1/2 cup flour
1/4 tsp baking powder
pinch of salt
1 stick unsalted, softened butter
1/2 cup sugar
1 egg yolk
1/4 tsp. vanilla
Fruit:
4-6 nectarines/peaches
1/2-1 cup sugar
2-3 tbsp. lemon juice

Directions:
1. Prepare your fruit filling and place into a pre-greased 8-inch square pan.
2. Mix flour, baking powder, and salt in a small bowl.
3. Beat butter and sugar until creamy. Then, beat in the egg yolk and vanilla.
4. Mix in dry flour mixture.
5. Dollop dough over the fruit (try your best to spread over evenly).
6. Bake at 375 for about 40-50 minutes or when the crust is a golden brown color.

Enjoy this immensely! And make sure you use good, ripe fruit.

Happy baking!
Monday, August 26, 2013
Deconstructed S'mores
So not going to lie but I did not have a lot of faith in this recipe until it was complete. Meaning along the way I was not sure if I was doing it right but then in the end it was delicious.

My cousin Kate sent me this recipe months ago and before I went back to school (which is where I am now) I decided to make it! My friend Chelsea helped me make it and eat it too! Love you Chels!
I am stealing my cousins title for it which is "Deconstructed S'mores." Basically there are 4 layers, all essential, and together equal perfection. The bottom layer is made of Biscoff cookies (among other things), the second layer is a butterscotch layer, the third is a marshmallow layer, and the final fourth layer is dark chocolate.
Just make these. Take my word for it. Specific warning on the butterscotch layer though. I used Nestle butterscotch chips which melt in a very peculiar way. I tried melting them in a pan and continued trying to melt them in the microwave. It turns into this kind of chunky consistency but don't worry. Just try to spread it out as much as you can and it will somehow all come together in the end. It just doesn't look very appetizing in the moment of melting.
I'm not even the biggest S'mores fan but these I could eat these all day long. Thank you Kate so much for this recipe! I will definitely be doing it again- maybe an entire pan just for Jake. Side story: I saved my boyfriend a hefty chunk of this dessert and brought it to him on the airplane and everything and he devoured it very quickly- which is a good sign.
Ingredients:
Cookie Layer:
- 1 package Biscoff cookies
- 2 tbsp. brown sugar
- 1 stick butter
Butterscotch Layer:
- 3/4 package butterscotch chips
- 2 tbsp. heavy cream
- 1/2 tsp. sea salt
- 1/2 tsp. cinnamon
Marshmallow Layer:
- 1.5 cups marshmallow fluff (a little more than one container)
- 1/2 tsp. cinnamon
- 1 tbsp. butter
Chocolate Layer:
- 3 cups chocolate chips (semi sweet)
- 1 tbsp. shortening
- 1/2 tsp. sea salt
*Flake salt to sprinkle on top.

Directions:
1. Preheat the oven to 350. Place the whole package of Biscoff cookies in a food processor and grind thoroughly. Add in the brown sugar and melted butter. Press crust ingredients into a greased 9x13 inch baking pan. Bake for 17 minutes and cool completely.
2. Melt the butterscotch chips with heavy cream in a saucepan. Stir constantly. Mix in cinnamon and salt. Spread as evenly as possible over cooled cookie layer. Chill in the fridge for 15-30 minutes.
3. For the marshmallow layer, microwave marshmallow fluff with cinnamon and butter for about 30 seconds or until liquified. Mix with a spoon to incorporate all the ingredients together. Pour over chilled butterscotch for 15-30 minutes.

4. Melt the chocolate chips and butter either in a double boiler or in the microwave. Spread the chocolate over the chilled marshmallow. Sprinkle flaked sea salt over the chocolate. Chill for 45 minutes to an hour. If you don't have much time you can place in the freezer as well.
5. Cut up and enjoy, but always keep in the fridge when not serving or consuming! Enjoy!

Saturday, August 10, 2013
Nectarine Blueberry Almond Galette
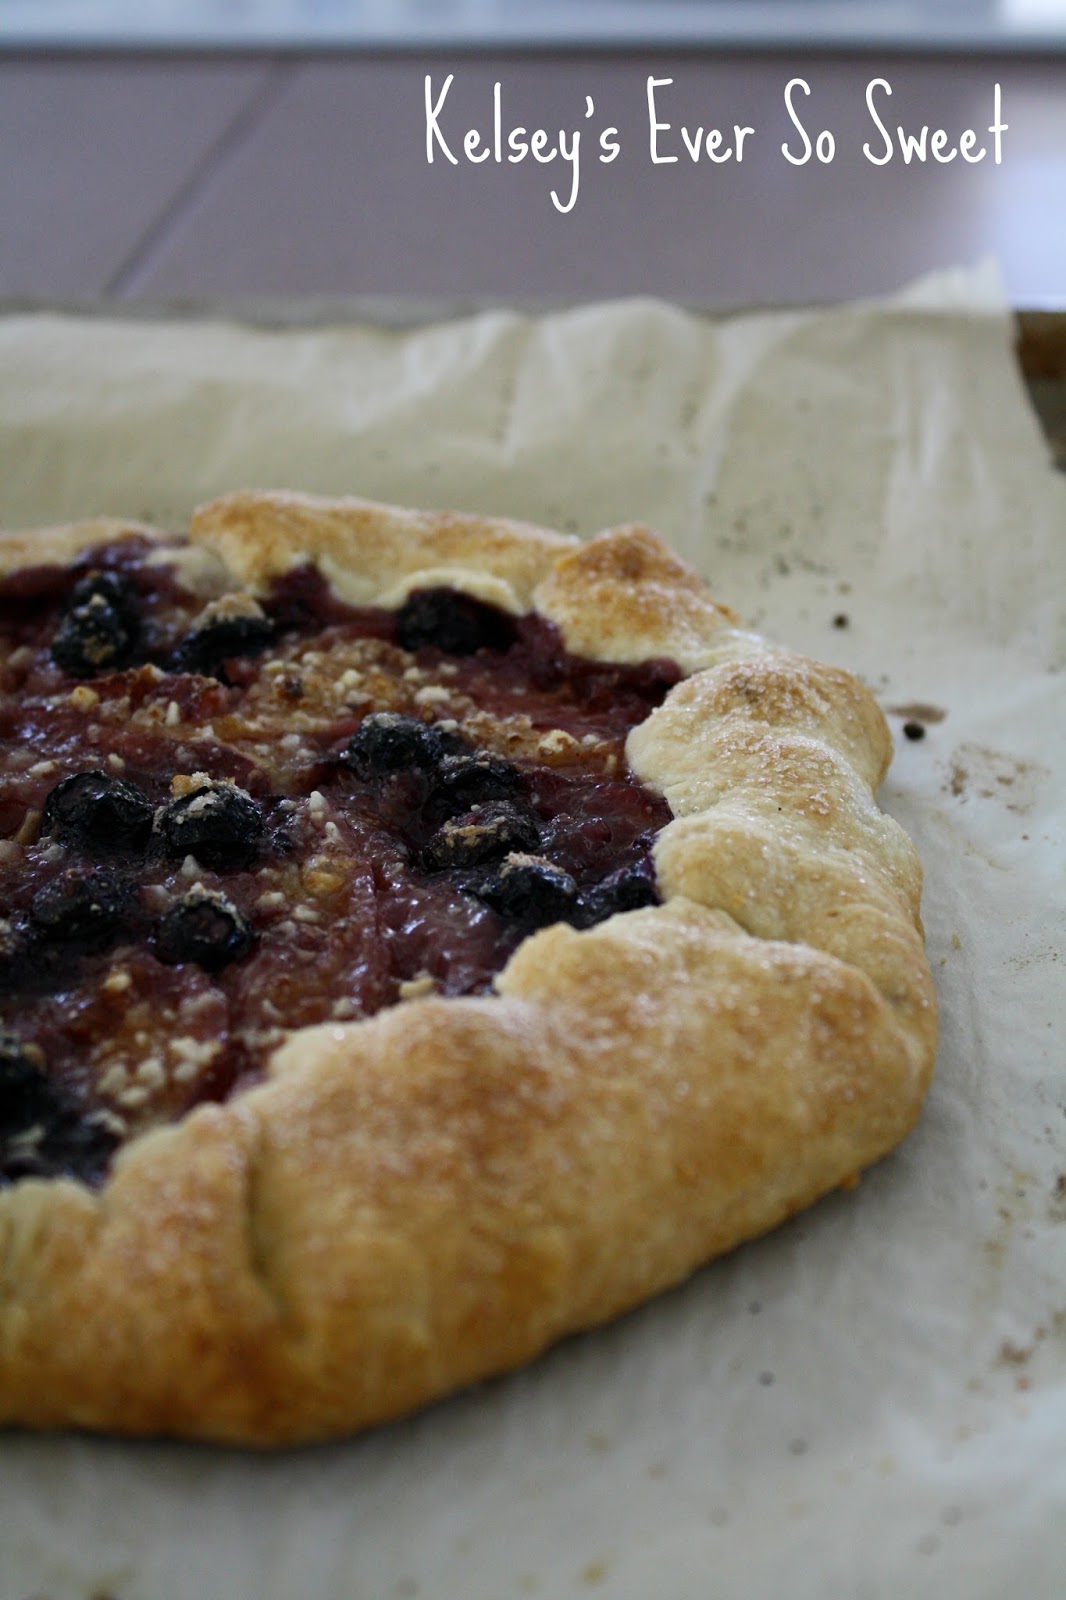
For those of you that don't know what a galette is it is kind of like a pie but it's open faced and you eat it like a pizza! Not a very accurate description but its how I think of it.
This particular galette has a sugar almond mixture layer, ripe nectarines, and blueberries.
Sorry that I have been a bad baker lately- I've been so busy with work and traveling to beautiful places! This is not a complaint! My summer has been awesome, just much crazier than normal.
Anyways, enough about me... I don't think I'd ever seen or tasted a galette before making it myself but I saw a recipe that inspired me on the blog A Cozy Kitchen and wanted to take a stab at it!
The best time to make this galette would be now when the summer fruit is fresh, juicy, and amazing. And the best time to eat this galette is right when it has cooled off a bit but is still warm. Slap a scoop of vanilla ice cream on top of it and you will be golden.

And don't forget to eat it like a pizza! Yummm!

Ingredients:
This recipe makes one galette (8-9').
Crust:
1 cup all purpose flour
1 tsp. sugar
pinch of salt
4 tbsp cold water
3/4 stick of butter (cold and cubed)
Filling:
1/4 cup finely ground almonds
1/4 cup sugar
2 big ripe nectarines (or 3-4 smaller sized)
1/4 cup blueberries
1 tbsp melted butter
1 tbsp extra butter (set aside)

Directions:
Crust:
1. In a large bowl, combine flour, sugar, and salt. Add the butter and using your hands mix until it is starting to incorporate and form dough. Add the water one tablespoon at a time and keep mending the ingredients until dough forms. Flatten, cover with plastic wrap, and put in the fridge for at least 1 hour.
2. Preheat the oven to 400 degrees F. Take the dough out of the fridge and roll out on a floured surface until it is only about 1/8 of an inch thick. Place a piece of parchment paper on a baking sheet and transfer the rolled out dough to the baking sheet.
Filling:
1. Grind a handful of almonds in a food processor until fine. In a small bowl combine sugar and ground almonds. Sprinkle 3/4's of this mixture into the center of the dough.

2. Cut up your nectarines into thin slices and make sure they are extra ripe! Place them and the blueberries in a pattern of your choice on top of almond/sugar mixture. Sprinkle remaining almond/sugar mixture over the fruit.

3. Fold in the border of the dough at an angle and pinch the dough together so that it is sealed and doesn't fall apart.

4. Brush the dough with the melted butter and sprinkle on some sugar on top of that. This will give the dough a nice crunch.
5. Bake in a lower (not the lowest) section of the oven for about 45 minutes, or until the crust looks very well browned and the fruit is bubbling!
6. Remove from the oven and cool for about 10-15 minutes, slice up, and serve.
Happy Baking everybody!
Monday, June 24, 2013
Raspberry White Chocolate Cupcakes

So this recipe is actually technically just for the frosting because the cake I used is just a standard box vanilla or yellow cake mix (I did not have a lot of time). But the frosting was AMAZING! It has fresh raspberry puree and melted white chocolate, so how could it not be!? If I made this again I would make the cake myself and add some white chocolate or raspberry to the cake mix as well.
Currently I am sitting at home on a rainy day with a very sore throat drinking lemon tea and eating lentil soup. Not the ideal summer day but it forces me to get some things done including posting this recipe!
These cupcakes were not planned at all. I was hired to make 12 cupcakes for a birthday party and mini cupcakes for a family friends party. The mini cupcakes are shown below and have the same frosting and chocolate shavings on top.

I also used these adorable cupcake liners for the minis! I thought the liners for the big ones were pretty sassy as well.


Ingredients:
This recipe makes frosting for 24 cupcakes.
1/2 cup white chocolate chips
1/4 cup heavy cream
1 stick unsalted butter, softened
1/4-1/2 cup chilled cream cheese (depending on how thick you want it)
3 cups powdered sugar
1 tsp. vanilla
1/4 tsp. salt
4-5 Tbsp. raspberry puree (made from 1/2 cup frozen raspberries)
*Optional garnish: white chocolate chips, sprinkles, etc.

Directions:
1. First you should start with the raspberry puree by placing roughly 1/2 cup of frozen raspberries in a strainer over a bowl and let them thaw for at least 30 minutes.
Once they have softened, mash with a spoon inside the strainer until all you have left is the seeds. Set aside for use later.

3. In an electric mixer, cream together butter, cream cheese, and powdered sugar until smooth (may take several minutes).
4. Turn mixer speed down and pour in the cream/white chocolate mixture. Increase speed until well incorporated. Add in salt and vanilla.
5. While mixing on low, add in desired amount of raspberry puree, and combine.
6. Place in the refrigerator for 15-30 minutes to stiffen, if needed, or if not using immediately.
7. Pipe onto cupcakes or cake with desired tip and add garnish if you wish! Refrigerate right after piping if you are not serving them immediately.
Enjoy! Happy Baking!
Monday, June 17, 2013
Chocolate Dipped Shortbread Cookies

There is an interesting story of how these shortbread cookies came about. Sorry Willie, (my 16 year old brother) but I am going to bash on you for just a second. So, I had just finished a long day of work and was looking forward to putting my feet up for the rest of the night when my brother calls me and asks if I can make him cookies for a bake sale the following day. I can never say no to baking no matter how tired I am so of course I agreed.
I thought for about 30 minutes about what was easy to make and what he could sell easily and I decided upon shortbread. My mom makes it every year at Christmas time and it is delicious but I had never actually taking a whack at it myself, so I thought why not?
They worked out quite splendidly and though my brothers bake sale was not very successful overall I happen to think that the cookies were... and my friends who got the left overs agreed as well.
The bake sale that my brother did was to prevent sex trafficking and to help people to escape to freedom so in the end I was happy to help out for a good cause.

I figured that I would do heart shaped cookies because everyone can use a little love. Especially at the end of the school year!
Also want to mention that I got this recipe from the Joy of Baking blog!
Ingredients:
This recipe makes about 25 heart shaped cookies.
2 cups flour
1/4 cup salt
2 sticks softened unsalted butter
1/2 cup powdered sugar
1 tsp. vanilla
3/4 cup melted chocolate chips

Directions:
1. Whisk the flour and salt together and set aside.
2. Beat butter in an electric mixer until creamy. Add in sugar and mix until smooth for several minutes. Mix in the vanilla extract.
3. Gently stir in the flour mixture (you will probably have to use your hands to knead it until it has a doughy consistency).
4. Flatten into about a 1/2 inch round shape, wrap in plastic wrap, and place in the refrigerator for about an hour.
5. Preheat the oven to 350.
6. Roll out the dough on a flat surface while making sure there is plenty of flour to keep it from sticking to the surface and the rolling pin.
7. Line baking sheets with parchment paper before placing cookies onto them.
8. Continue to roll it out until it is about a quarter inch thick and using cookie cutters cut out whatever shape you want.

10. Bake for about 8-10 minutes, or until the cookies are just turning a very light brown color.
11. If you want to make these twice as delicious melt some chocolate chips in a glass bowl and using a knife, spatula, or dipping, paint some melted chocolate onto each cookie and set aside to allow them to cool and harden.
Feel free to add different sprinkles or decor onto the chocolate as displayed below.
Once they have set (or even before) dig in!

Happy Baking as always!
Wednesday, June 12, 2013
Double Chocolate Heath Bar Cookies with Salted Caramel
This cookie is very multifaceted because not only does it have chocolate chips and cocoa powder but it has toffee/heath bars bits as well, not to mention the salted caramel drizzled on top!

Baking is sort of an addiction of mine. When I get hooked on the fact that I want to bake something it will most likely happen. I had several little bumps in the road while making these cookies like randomly having no baking soda and scootering down to my neighbors who graciously gave me some. Of course I returned the favor by giving her a plate of cookies! Another was that I barely had any caramel so only about half of the cookies had it which is fine because it isn't totally necessary but gives it some extra oomph.
This summer has been great so far, I have a perfect balance between baking, blogging, working, free time, time with friends and family, etc. I am excited to hopefully start volunteering at an animal shelter sometime soon as well.
If you have a history with me you know that I like Heath Bar, especially because my boyfriend gave me pounds of it 2 years ago... which is now almost gone, this is the last bag:

I guess this is going to be good for me though because I will need to expand beyond the world of Heath bar deliciousness! Anyways hope you enjoy this recipe which was inspired by Center Cut Cook.
Ingredients:
This recipe makes about 4 dozen cookies.
2 sticks of unsalted softened butter
1.5 cups sugar
2 eggs
2 tsp. vanilla
2 cups flour
2/3 cups cocoa powder
3/4 tsp. baking soda
1/4 tsp. salt
1 cup chocolate chips
1 cup heath bar bits
*Optional: salted caramel for topping

Directions:
1. Preheat the oven to 350 degrees.
2. With an electric mixer combine softened butter and sugar until it appears creamy. Add in eggs and vanilla and mix again until combined.
3. In a large separate bowl combine flour, cocoa powder, baking soda, and salt. Mix the dry ingredients into the wet with a spatula.
4. Fold in the chocolate chips and toffee.

5. Roll the cookie dough into balls and space evenly apart on a baking sheet. It is recommended to leave about 1.5-2 inches of space between each dough.

6. Bake for about 8-10 minutes, remove from the oven, allow to cool a little on the sheet, and finally transfer onto a cooling rack.
7. While they are cooling drizzle the salted caramel onto each cookie.
Serve and enjoy!

Happy baking everyone!
Subscribe to:
Posts (Atom)